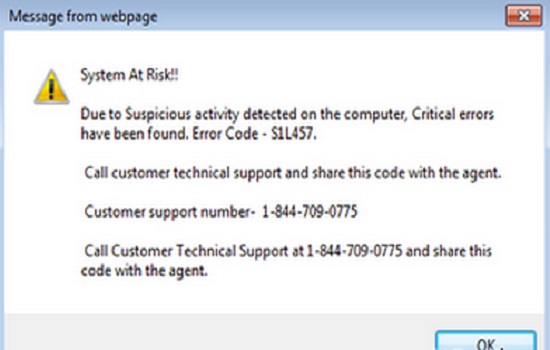
Error code S1L457 may occur in Mac when you try to log in to the user account on your device, and you may be unable to connect to Wi-Fi or even have problems with the display of apps, documents and more. Error code S1L457 can be troublesome and time-consuming, but we can help you find the solution and restore your computer’s functionality quickly and easily. Here’s how to fix Error Code S1L457 in Mac!
Verify that the issue is caused by this file
This error is generally caused by a corrupted file. We recommend trying the following:
1) Reboot your computer and hold down Command + R while it reboots
2) Press Shift + Ctrl+ Option while you’re booting up your computer, this will force the system to enter Safe Mode. From there select the ‘Verify Disk Permissions’ option from the System Utilites screen.
3) Hold down Command-R again and restart your computer.
Perform a Safe Boot
Shut down the computer and restart it. The start-up screen will read OS X instead of the usual startup screens that show your user account name. When you see this, press and hold the Shift key as you press the power button. Release these two keys when you see a gray screen with a Utilities menu icon. A Utilities window will pop up on your desktop with a list of troubleshooting tools. Find Disk Utility, select it, then click Continue. In Disk Utility, select Macintosh HD (or whatever hard drive name is shown) on the left side of the window pane and then click Repair Disk Permissions on the right side of this same pane.
Restore from Time Machine Backup
Restoring your Mac from a Time Machine backup is not the only solution, but it’s the quickest way to get back on your feet. This process could take up a few hours or even days, depending on how often you back up your data and how much has changed since the last backup. If this doesn’t sound like an option for you, then try these steps:
First, make sure that your network connection is working properly by checking for any issues with internet connectivity. If there are no problems with that, try updating all of the software on your computer by going into System Preferences and downloading any updates that are available. Next, check if there are any third-party apps installed on your computer that may have caused this error.
Delete .recently-used.xbel Files
Mac computers can sometimes get a little clogged up with unwanted files, but you can easily delete them from your computer. Open Finder, and then hit Command + Shift + A on your keyboard. This will open the MacOS system folder, which is where all of your apps are stored. Look for the .recently-used.xbel file and delete it when you find it!
Try to Move the File Outside Desktop
Open Finder and select the Desktop folder. Check if there’s a file called Desktop. If there is, try moving it outside the Desktop folder. Close Finder and re-open it again. Click on the Desktop icon and see if your files are still missing. If they are, try removing or renaming the hidden .DS_Store file which might be causing this issue.
Download The Latest Version of Safari
One way you can try and fix this error is by downloading the latest version of Safari. If you are running an older version of the software, it may be time for a refresher. First off, make sure that your internet connection is working correctly. You can do this by checking your wifi or ethernet connection. Next, go to the App Store and update Safari if there is an update available. Alternatively, if there is no update available, go ahead and download the latest version of Safari from the App Store (make sure you have enough storage space). After installing the new app, reopen Safari.
Remove Preferences.plist File From Library Section
To remove the Preferences.plist file, navigate to your Mac’s Applications folder and hold down CTRL+A (Command+A for a Mac) on the keyboard. This will highlight all of the files and folders within your Applications folder. Next, drag the Preferences.plist file over to your Trash icon at the top of the screen and release it. Now click on Empty Trash from the pop-up menu that appears. The Preferences.plist file is now removed from your computer’s library section so you no longer receive error messages about it when launching applications that require it as a prerequisite program.
Reset NVRAM/PRAM/SMC Settings
Before you start any repairs, make sure your Mac is turned off. To reset the NVRAM and PRAM, turn off your computer and unplug it from the power source for at least 10 seconds. After you have done that, plug it back in and turn on your computer. Next, hold down Command+Option+P+R keys together until you hear a chime sound. This will reset the NVRAM and PRAM settings on your Mac. If that doesn’t work, try resetting the SMC by turning off your computer (keep unplugged) then holding down Shift-Control-Option while turning on the computer again. You should now see an Apple logo appear followed by a progress bar.